How To Use Keurig K-Mini? [A Step-By-Step Guide]
Keurig is famous for its versatility and convenience. There are various Keurig coffee makers to suit every coffee lover’s preferences; you name a requirement for your brewer, and Keurig will have something to offer.
Keurig K-mini coffee maker is the most prominent choice for people who like a compact and sleek brewer that fits smaller spaces. It is easy to use and also affordable compared to other Keurig brewers.
Keurig mini offers four cup sizes; 6oz, 8oz, 10oz, and 12oz. It can prepare several beverages in under two minutes, including coffee, tea, cocoa, and iced drinks.
I prefer K-mini because it doesn’t have a water reservoir. I frequently travel for work, so when I leave my Keurig at home, I don’t have to worry about water sitting in the tank for days. It is the perfect coffee maker for people like me who drink coffee occasionally.
Whether you are going to brew your first cup with Keurig K-mini or you are planning to buy it, I will give you everything you need to know to use it for preparing the perfect cup of coffee.
What are the Parts of the Keurig K-mini?
A Keurig mini consists of the following parts:
Water Bin
A K-mini does not come with an internal water reservoir. You can add a certain amount of water to its Water Bin. The brewer will use the whole water to brew a cup of coffee.
The water bin can hold 6 oz, 8oz, 10 oz, and 12 oz. The amount of water you add to the water bin for each serving determines the brew size of your coffee. The water bin has a graduated scale that shows how many ounces you will brew.
Drip Tray
K-mini has a drip tray below the coffee spout. When you brew coffee, you can place your cup on the tray. It also makes it easy to clean spills because the drip tray is detachable. You can easily remove the tray and wash it with fresh water.

Another advantage is the extra space you get by removing the drip tray. Once you remove the tray, the machine accommodates travel mugs up to 7 inches in length.
How to Setup the Keurig K-Mini?
If you still need to set up your Keurig k-mini, unbox it to make it ready to brew a delicious cup of coffee. Following are the steps required to set up your K-mini brewer:
Step 1: Plug your Brewer
After removing the packing tape from the Keurig coffee maker, pull out the plug and extend the cord from the cord storage located at the back.
Place your brewer on your favorite corner of your kitchen, ensuring a power outlet is nearby. Plug the coffee brewer into the outlet and press the power button. The power button will start illuminating to confirm the brewer has turned on.
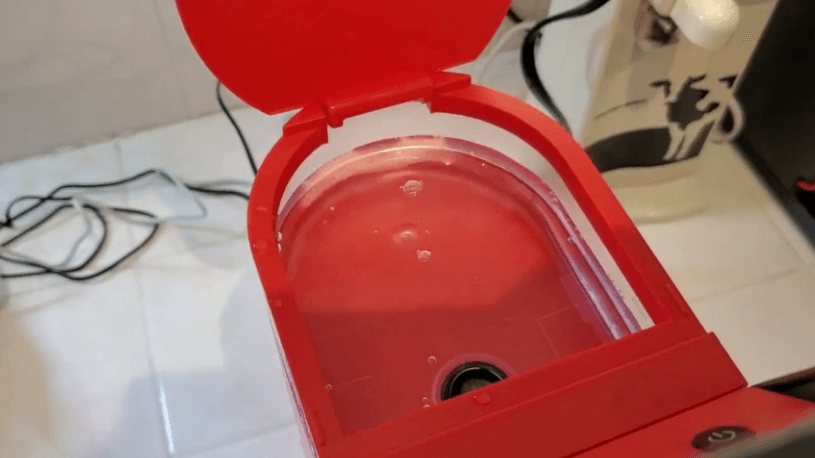
Step 2: Set up the Water Bin
Next up, lift the lid of the water bin to fill enough water to brew a cup. Be careful not to fill over the MAX or below the MIN fill lines.
You can quickly figure out how much water to use in your Keurig Mini brewer by filling the mug you intend to use for your coffee. Once done, close the lid of the water bin.
Note: Use only filtered or bottled water in your Keurig coffee machine rather than distilled water. Your machine will experience metal corrosion if you use distilled water because it contains no minerals.
Step 3: Lift and Lower the Handle
Lift the machine head of the brewer and close it down without adding a K-cup. Once you perform this step, the brewer will light up its brew indicator to confirm that it is ready for brewing.
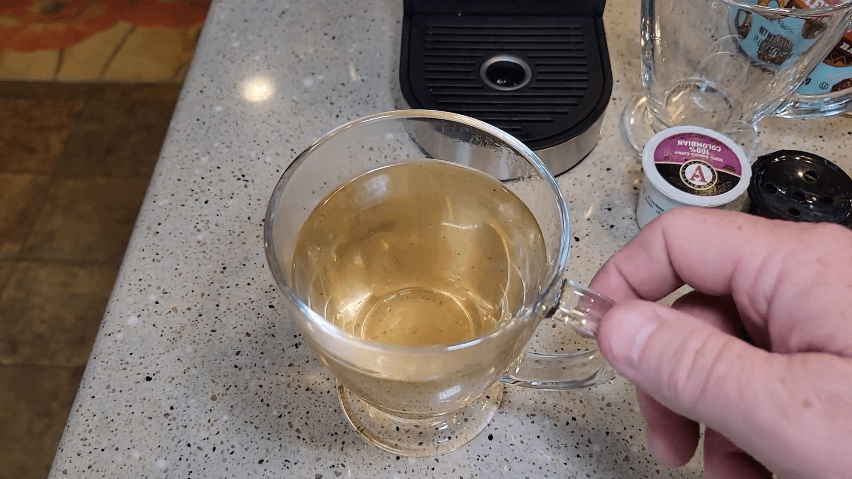
Step 4: Run a Cleansing Brew
You should run a cleansing brew before making your first cup to remove any factory dust or other particles from the machine.
Once you have set up the coffee brewer, press the brew button. A solid brew light will illuminate while the coffee maker is heating, and then the light will begin to pulse. When the light turns solid again, the water will start to dispense. Discard this water in the sink.
Step 5: Choose your Favorite K-cup
Now that your K-mini is set up and ready to brew you a tasty cup of coffee, choose your favorite K-cup. You can use any k-cup of your choice because they are compatible with all Keurig models.
Several brands like Tim Hortons, Starbucks, Dunkin Donuts, and Green Mountain manufacture K-cups, so many options exist to suit your preferences. Depending on how you like your coffee, you can choose light roast, dark roast, flavored, or decaf.
How to use Keurig k-mini?
Using a Keurig K-mini is as easy as simply inserting a K-cup and pressing the brew button. You don’t require extra steps or equipment to prepare a cup of coffee.
Follow these steps to brew a cup using your k-mini coffee maker:
- Add water to the water bin of your brewer. The amount of water depends on the volume of coffee you want to brew.
- Place a coffee mug under the coffee spout.
- Lift the lever of the coffee machine and insert a K-cup.
- Close the lever properly to lock the machine.
- Press the power button on the machine to start the heating process.
- The power indicator light will begin to pulse when the heating process starts.
- Within under two minutes, the machine will heat up. The power indicator light will turn solid to confirm it.
- The coffee maker will start dispensing coffee into your mug.
- Once the coffee brewing process completes, the brewer will stop automatically.
- Open the lever to eject the used coffee pod.
- The coffee maker will go to power-saving mode after 90 seconds of inactivity.
- Enjoy your Keurig coffee!
How to Keep your Keurig K-mini Well Maintained?
To keep your Keurig brewer working effectively, you must pay attention to its maintenance. I have some tips and tricks to extend the life of your K-mini.
Use Filtered Water for Brewing Coffee
It is important to use bottled or filtered water for brewing coffee. You must use suitable water for your coffee to taste the best and be of good quality.

Using filtered water improves the coffee’s flavor and is suitable for the brewer. If you use distilled water, it will increase the chances of buildup and limescale accumulation in the internal parts of the coffee machine.
Clean the Exterior
Cleaning the exterior of the Keurig Mini is necessary a couple of times per week if you are a regular user. Use a microfiber cloth to clean the exterior of the machine.
Remember to avoid any abrasive brush or cloth, as it may cause scratches on the body.
Also, never bring water or wet cloth in contact with the exterior of the brewer.
Clean the Interior
Ensure your coffee maker is clean internally by descaling it every three to six months. Depending on how much you use it, the duration may differ. Regardless of the time frame, descale your Keurig after brewing 300 coffee pods.
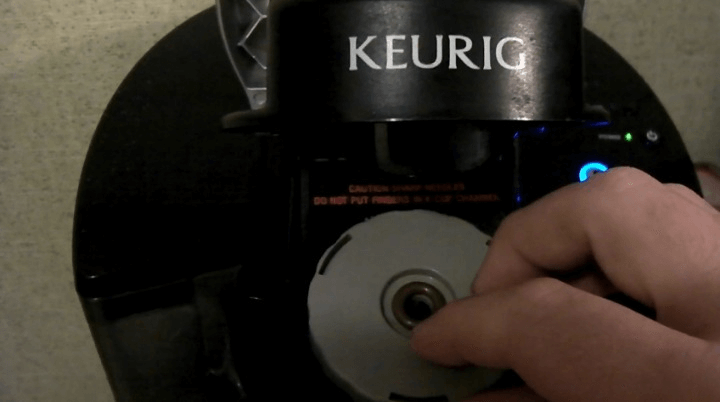
To deep clean your brewer, you must occasionally clean its needles. This video will walk you through cleaning the exit and entrance needles.
How to Clean and Descale Keurig K-mini?
Descaling is the process of removing debris and mineral deposits from the internal parts of the coffee brewer. Regular cleaning and descaling keep the buildup at bay.
Follow these steps to descale your K-mini:
What you will need
- Keurig Descaling Solution
- Fresh Water
- Soapy Water
- Non-abrasive cloth
Method
- Put one-third of the Keurig descaling solution into the water bin and fill it with 10 oz water.
- Place a cup on the tray to collect gunk.
- Lift the lever on the brewer.
- Close the lever without inserting a K-cup.
- Push the brew button.
- The brewer will start dispensing water and will disperse the residue and buildup.
- Dispose of the water in the sink.
- Repeat the process but press the power button when the brew light turns solid. Let the descaling solution sit in the machine for 30 minutes.
- Press the brew button to let the machine dispose of the contents.
- Dispose of the gunk in the sink.
- Add fresh water to the brewer and run several cleansing cycles without adding any descaling solution or coffee pods.
- Remove the detachable parts of the machine, the water bin, and the drip tray. Soak them in soapy water for a few minutes to remove coffee oils and residue.
- Rinse the removable parts under running water thoroughly. Clean them with a non-abrasive cloth and let them air dry.
- Assemble your coffee brewer.
- Your Keurig is now clean and ready to use.
Keurig Mini Troubleshooting
Your K-mini can give you a hard time if you are unaware of the problems that may occur with your brewer. So, let’s look at some common issues Keurig mini users face and how to troubleshoot them.
Water is Leaking from K-cup Pod Holder
If your Keurig brewer leaks water, it can be because the pod holder doesn’t sit right. Open the machine head to ensure the pod holder has no obstacles, and close the lever correctly.
If water still leaks from the pod holder, it is time to replace it with a new one.
Coffee Ground in the Cup
If your brewer is dispensing coffee grounds with the coffee, it could be due to clogged needles. If grounds have built up in the exit or entrance needles, a straightened paper clip can help remove them. Make sure you handle the needles gently, or they can give you a nasty poke.
If the needles seem bent or broken, contact Keurig customer service to replace them.
K-Mini is not Making a Full Cup
If the coffee maker is not making the correct amount of coffee, it needs cleaning or descaling. The build up in the brewer hinders the water flow through the machine, dispensing less coffee.
If you descale your brewer regularly, but it still makes half a cup, contact Keurig customer service for further assistance.
The Brewer is not Heating Up
When the brewer heats up, it pumps hot water through the K-cup to brew coffee. When the water heater malfunctions, the water will not reach the proper temperature, and the brewer will not heat up.
The first thing to fix this issue is to descale your Keurig. Gunk and debris clog the brewer, halting the heating process.
Even if you regularly descale your brewer, it may still show problems with heating. You will need to remove the water heater unit from the machine and replace it.
Keurig K-Mini vs K-Mini plus: How Do They Differ?
Keurig K-mini and k-mini plus resemble each other, but each is unique. K-mini and K-mini plus are compact, cost-effective, and easy-to-use coffee brewers.
However, the K-mini Plus might have some additional advantages over the K-mini. The K-mini Plus has a “Strong brew” function and pod storage, making this model unique.
The “Strong Brew” function is invaluable for coffee lovers who enjoy strong drinks. Pressing the strong button takes a bit longer for the brew to flow, resulting in a complete extraction and a bolder brew.
On the other hand, the K-cup storage bin can store up to 9 K-cups. The storage bin keeps the coffee pods safe from heat and moisture, keeping their natural flavors intact.
Other differences include the removable water reservoir in the Mini Plus, making it much easier to clean and refill at the sink. It also allows you to brew several cups without refilling the water tank for each brew.
Conclusion
Those who want a slim, compact brewing experience and don’t mind refilling before each use will enjoy the Keurig K-Mini.
The Keurig Mini can brew a delicious cup of coffee in under three minutes, is easy to use, and comes reasonably priced.
FAQs
Can I use any K-cup in a Keurig Mini?
All k-cups are compatible with Keurig mini. You can also use Keurig’s reusable coffee pods and add the ground coffee of your choice.
Can you run vinegar through a mini Keurig?
Yes! You can use a mixture of white vinegar and water to clean your Keurig if you don’t have a descaling solution. However, ensure you use equal vinegar and water to prevent damage to the machine’s internal parts.
Can I make hot chocolate in Keurig K-Mini?
You can make hot chocolate in your Keurig k-mini by using hot chocolate k-cups. Insert a hot chocolate k-cup in the brewer, add water to the machine, and press the brew button. Your hot chocolate will get ready in about a minute.
Can you put milk in a K Mini?
No! Adding milk to the K-mini is not an option. Milk can dry up and cause damage to the brewer, and it can also leave a bad smell.
Can you use tap water in a Keurig Mini?
If your tap water is clean and filtered, you can use it in your Keurig. Using filtered or bottled water in Keurig coffee makers is ideal for the best results.
Does Keurig Mini have a warranty?
Keurig k-mini comes with a one-year warranty. The warranty starts from the date of purchase.