Is Your Keurig Dripping Slow? (Fix It By These Simple Solutions)

Getting your morning coffee should be a quick and enjoyable experience. You should be able to get a caffeine boost from your favorite roast whenever you want. For this purpose, coffee lovers like investing in a Keurig.
A Keurig can cater to all your cravings. Just turn on your Keurig machine, pour water in it, pop your K-cup, and wait for your favorite cup of coffee.
But has your Keurig started dripping coffee slowly? Is your Keurig coffee maker taking longer and longer to brew than when you first got it?
Within about 20 seconds, your Keurig should pump about 1 inch of water out of the tank. It has a clog if it takes more time or dispenses less water. It is most likely that excess scale has built up inside the water lines.
The Keurig slow drip is a common problem among coffee drinkers unaware of some simple cleaning steps crucial to maintaining these machines. Cleaning the exit needle and performing a Keurig descale usually solves these problems.
This article will guide you through some steps you can take to troubleshoot your Keurig.
- A clogged Keurig will take longer to brew your usual cup of coffee.
- Keurig coffee machines require regular cleaning to avoid clogging and technical difficulties.
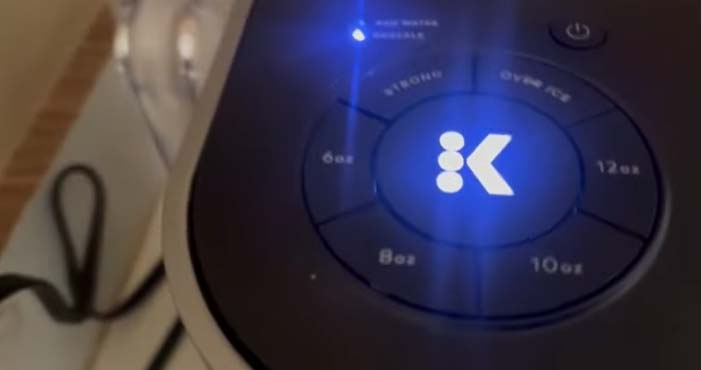
- A Descale light turning on is probably the first indicator to tell you that your Keurig needs cleaning.
- You can use a sewing needle or a paper clip to unclog the needles of your Keurig.
- The brand replaces the damaged parts of a Keurig for free if it is under warranty.
Possible Reasons Behind Keurig Slow Drip
Keurig dripping coffee slowly is frustrating, especially when you don’t know why. We have come up with a few problems and their solutions to help you find the culprit of your slow Keurig.
Reason 1: Descale Light is on
The Descale light is an indicator of the ongoing issue with the cleanliness of the Keurig machine. If your Keurig is dripping slowly and the descale light is on, an accumulation of mineral deposits can hinder the brewing process.
Solution: Descale your Keurig coffee machine
A Keurig requires descaling every 3 to 6 months to keep the coffee machine in proper working conditions. Descaling removes the buildup of limescale and other particles in the internal parts of the coffee machine.
Follow these steps to Descale your Keurig:
- Eject the K-Cup.
- Empty the drip tray.
- Empty the water reservoir.
- Pour the entire bottle of Keurig Descaling Solution into the water tank.
- Put a mug under the spout.
- Choose the largest cup size and press the brew button without inserting a coffee pod.
- When it dispenses water, and the cup is full, empty the contents and repeat the process till the machine runs out of water.
- Fill the water reservoir with fresh water and run 5 to 6 cycles.
- Repeat the cleansing brew till the descale light turns off.
- Let the coffee machine sit for 15 to 20 minutes.
- Your coffee machine is ready for use!
You can make a descaling solution with white vinegar. Make sure to use the right proportions because vinegar can damage the internal parts of the coffee machine due to its acidic nature. We recommend mixing equal parts vinegar with water.
Reason 2: The Puncture Needle is Clogged
K-Cups contain coffee grounds securely sealed in them. Keurig coffee machines use sharp needles inside the pod holders to puncture through the layers of K-Cups, allowing water to pass through the coffee grounds and eventually into your cup.
There are two needles on a pod holder for piercing the K-Cup from the top and the bottom. Coffee grounds and residue can accumulate around these needles and might dry up if you do not clean them occasionally. It results in a slow drip.
Solution: Clean the Needles
You can fix this issue by removing the k-cup holder from the brewer and thoroughly rinsing both sides with warm water. The Keurig needles require deep cleaning if it doesn’t resolve the issue.
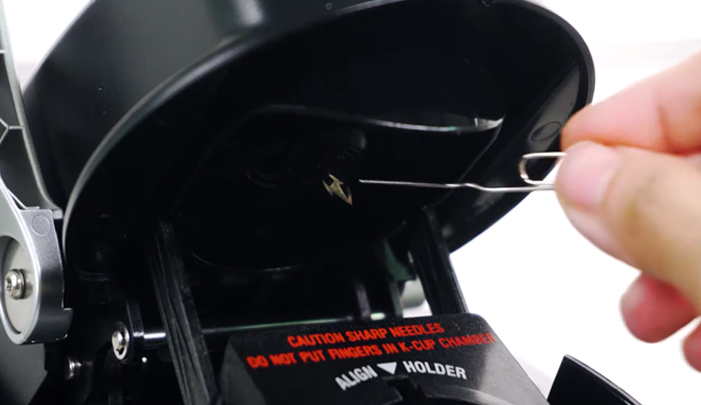
To clean needles, you can use paper clips or sewing needles. You must be careful while handling the needles because they are blunt and sharp and might give you a nasty poke.
Follow these steps to clean the needle with a paper clip/sewing needle:
- If you are using a sewing needle, it needs no alteration. But if you are using a paper clip, straighten it.
- Turn the brewer off.
- Remove the water tank of the coffee machine.
- Open the head of the machine and gently remove the pod holder.
- Pull on both sides of the holder to detach it from its funnel.
- You will see a tube on the pod holder; insert your cleaning tool in it.
- Gently move it around to scrap off all the gunk and residue that has probably dried up there.
- Now thoroughly rinse it with fresh water and let it air dry.
- To clean the entrance needle, lift the brewer’s head.
- Clean the entrance needle with the paper clip.
- Reassemble the pod holder and its funnel.
- Snap it back in the brewer and close the lever.
- Your brewer is ready for use!
There are high chances of experiencing this problem if you do not discard your pods immediately after brewing.
Reason 3: Water Line is Blocked
A Keurig machine has pipes and tubes for the water to flow to the heating chamber and through the K-Cup during the brewing process. When these pipes or tubes accumulate gunk or residue, it will disturb the water flow.
Descaling your machine can remove the scaling and buildup. However, sometimes even descaling fails to fix the issue. Your brewer might be facing some underlying issue with the water valve, causing discomfort in the brewing.
Solution: Clean the Water Valve
The water valve at the bottom of the water tank can get clogged due to buildup and minerals; follow these steps to clean z blocked water line:
- Remove the water reservoir of the brewer.
- Clean it with hot water and dry it with a cleaning cloth.
- The water tank has a valve at the bottom; use a screwdriver to remove it.
- Clean the screen inside the water valve.
- Fill the valve with vinegar and let it sit for a few hours. The acidic properties of vinegar with remove the buildup.
- Rinse the water valve thoroughly with fresh water.
- Put the water valve and water tank back into the machine.
- Your machine is now ready to brew coffee.
How to Clan Needle of Keurig 2.0?
The basics of cleaning all Keurig coffee makers are probably similar, but Keurig 2.0 is slightly different because the brand recommends its maintenance tool to clean it properly.
The brewer maintenance accessory can assist you in removing the dried-up residue in the entrance needle of your coffee brewer.
Here are the steps to use the Keurig Mainatince Tool:
- Unplug your coffee machine.
- The maintenance tool consists of a silicon bulb fill it with water.
- Lift the head of the machine. Put the maintenance tool on the pod holder with the rings’ arrows pointing downwards.
- Gently press it down.
- Open and shut the lever of the machine five times in a row. This process removes the coffee grounds and residue stuck in the pod holder.
- Remove the maintenance tool from the pod holder.
- Choose the 6 oz cup size and run a complete brew cycle without inserting a K-Cup.
- You can use Keurig cleaning cups for better results.
- When the brew cycle completes, empty the contents.
- Put the water tank and pod holder back into the machine.
- Use a K-Cup to run a cycle and check if the machine is working properly.
- Your Keurig 2.0 is now clean!
Here is a demonstration video of cleaning a Keurig using the maintenance tool.
What to do if Keurig is Still Dripping Slowly?
You have tried all remedies, and your Keurig is still dripping slowly? The last resort is to contact Keurig customer service. Keurig will repair or replace your machine free of charge if it is still under warranty. Sometimes, replacing an internal component can fix a slow Keurig.
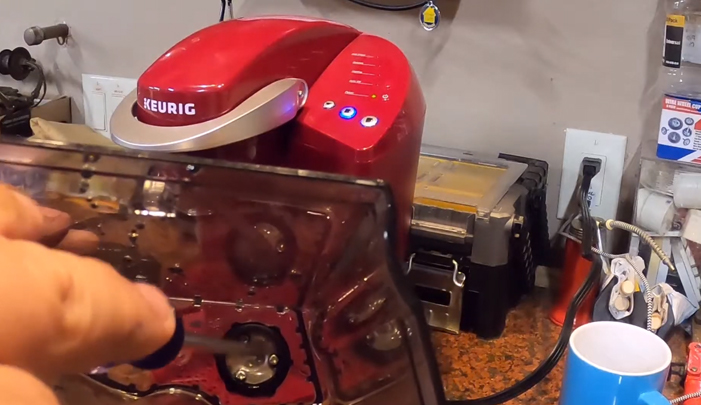
You can consult the local technician to fix your machine if it is not under warranty. If you have technical skills, you can disassemble the Keurig machine to check the water pipe and the needle entrance points.
You will sadly have to let go of your Keurig machine if all else fails.
The Bottom Line
So, there you have it: quick and easy steps to unclog your Keurig coffee maker. Usually, cleaning and descaling your Keurig will fix a slow brew cycle, so try both before taking more drastic measures.
Occasionally, an integral component of the machine can be the culprit, and only its replacement can fix the issue. In this case, replacing the entire machine may be more cost-effective.
For your machine to function properly, we recommend you do not neglect regular cleaning and maintenance. Hopefully, now you know how to avoid any issues and fix them if they happen. Happy Caffeinating!
FAQs
How do I unclog my Keurig?
The fastest way to unclog a Keurig is to run one to three brew cycles. Do not insert a K-Cup; press the brew button to run a cycle. Empty the contents and repeat the process thrice for the best results. Hopefully, it will unclog your Keurig.
Why is my Keurig only brewing a few drops?
If your Keurig is only brewing a few drops, it requires cleaning. Because there are chances that the debris or coffee residue has clogged the internal parts of the coffee machine, hindering the brewing process, a few cycles or descaling can fix this issue.
How long does a Keurig last?
A Keurig brewer usually comes with a two-year warranty and can last up to 3 to 5 years. The condition is to clean it regularly and maintain it well, so it lasts you a long time.
Why is my Keurig not pouring a full cup?
Your Keurig is probably not pouring a full cup because the needle in the pod holder is not working to its full potential. The coffee residue or gunk accumulates around the needle if you neglect its cleaning. It then dries up and causes a problem in brewing a full cup.