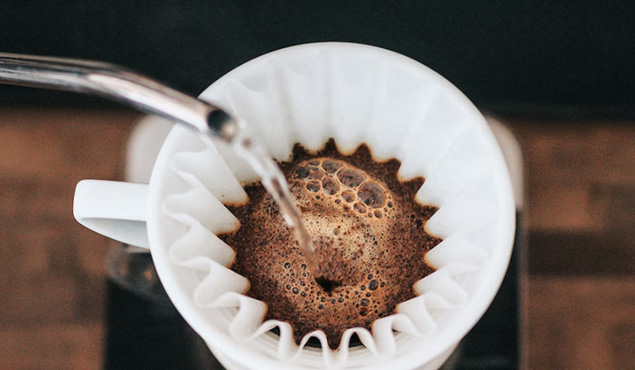
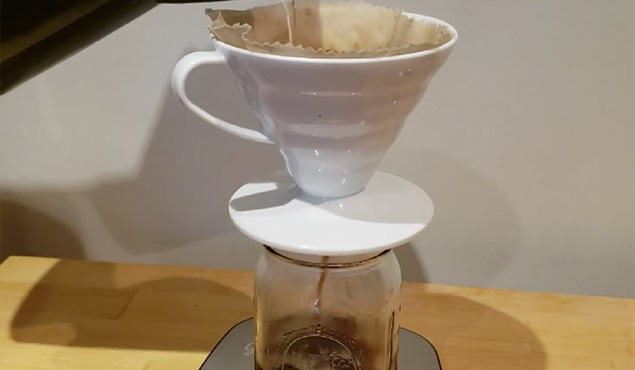
How To Make Coffee Without Filter? ( Methods To Learn!)

I can’t read minds but it seems that someone’s in a bit of a pickle.
You’re ready to jumpstart your day, but your coffee filters have gone MIA, right?
It isn’t a disaster.
Not as long as you can come up with creative ideas on how to Make Coffee Without a Filter.
In fact, brewing coffee without a filter is kind of like being an eccentric inventor_ it’s experimental, it’s bold, and it might even be a little bit risky (well, not really, but it sounds cooler that way).
So buckle up, my filter-less friend, and discover your new favorite brewing method in the process.
Some Techniques To Make Coffee Without A Filter
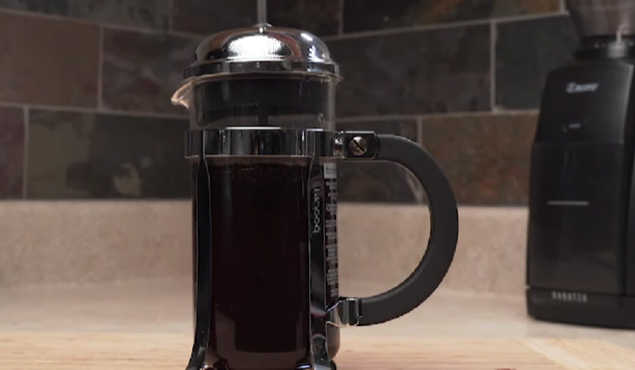
1. French Press
French press a.k.a. true-blue is the finest brewing tool without filter and the best part_ it is super simple to use.
How to do it
- Preheat the brewing vessel with hot water (no need to fill it all the way up; put the lid and give it a swirl to get everything nicely warmed up).
- Make sure coffee beans are ground at a medium level.
- Measure grounded coffee (i.e., for every 4 ounces (118 ml.) of water, you’ll use 8 grams (1 tbsp.) of coffee grounds). Customize the water-to-coffee ratio as per your taste.
- Boil the water for 30-45 seconds. The ideal temperature for brewing coffee is between 195-205°F (90-96°C).
- Add coffee ground in the press about halfway.
- Pour hot water (make sure that your water isn’t too hot, otherwise, it can scorch the coffee and create a bitter taste).
- Stir the mixture gently to make sure it is evenly saturated.
- Place the lid and let the coffee steep for 4-5 minutes, depending on your preference.
- Gradually press down the plunger to filter out coffee grounds from the liquid.
Luscious coffee without the filter is ready to serve!
Pros
- It extracts natural oils and flavors, giving a full-bodied coffee.
- Full control over the brewing process to adjust the water temperature, coffee-to-water ratio, and brewing time.
Cons
- It requires a coarser grind and will be challenging if there’s no grinder.
- Risk of over-extraction as it has a longer brewing time than other methods.
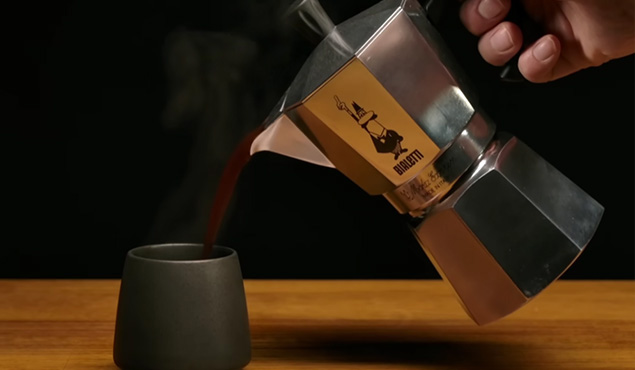
2. Moka Pot
Moka pot brews strong coffee without the hassle of a filter. It makes your kitchen smell like heaven, and intimidates cats (it’s true).
How to do it
So, don’t let the Moka pot collect dust in your cupboard! Follow these steps for a delicious brew that won’t make your face pucker.
- Grind your coffee beans (to avoid a bitter taste grind coffee not like a table salt but a bit coarser).
- Add coffee grounds to the Moka pot’s filter basket (just fill it and level it off, don’t tamp).
- Keep the pot clean and fill the valve halfway with hot water.
- Tighten the top and bottom part of the Moka pot and place it on a stove on medium heat.
- As the water begins to boil, the coffee will start to flow into the top chamber.
- Once you hear a gurgling sound, cool it down, take it off the stove, and rinse it under a cold tap in the sink.
Finally, pour it into your mug and enjoy!
Pros
- It’s compact and portable, making them a great option for travel.
Cons
- It requires maintenance if not done they become corroded.
- It can be finicky as the temperature and grind size needs to be just right for a Moka pot to work properly.
3. Paper Cloth, Napkin, or Handkerchief
No filter? No fuss. As I’ve come up with a vintage method of using household items that have been around for generations.
How to do it
Still, it is eminent in many households to produce delectable coffee. Some nitty-gritty to follow:
- Fold a handkerchief/napkin in half and place it in the filter basket of the coffee maker or mug. For paper towels, you need to cut 2-3 pieces so that they’re approximately the same size as a coffee filter.
- If the lid doesn’t close, snip the edges over the basket.
- Grind your coffee beans to a medium level.
- Boil water around 195-205°F (90-96°C).
- Scoop the ground coffee into the center of the cloth, making sure it is evenly distributed.
- Start by pouring just enough water to wet the grounds, then leave it for 30 seconds.
- Slowly pour the rest of the water over the grounds, to avoid overflow on the cloth.
- Once all the water has been poured, let the coffee drip into your cup.
And it’s done!
P.S. This might not be the finest cup of joe you’ve had, but it will surely be sediment-free.
Noted: 3 things to remember using a handkerchief can result in a slightly grittier texture. Plus, the coffee flavor is dependent upon the type of cloth used, so it’s best to use an unbleached cotton or linen cloth. Considering the quality of standard paper towels in mind, my suggestion would be to opt for reusable paper towels as they’ll withstand longer brewing.
Pros
It’s inexpensive as it doesn’t require any additional filters.
Cons
- Slightly gritty texture
- Inconsistent brew as the quality can be difficult to control, and it can be affected by the type of cloth used, the coffee-to-water ratio, and the water temperature.
4. Cowboy Coffee or Camping Coffee
This is the quintessential way of brewing coffee for those who like to live life on the wild side.
How to do it
To get yourself a cup of coffee that’ll knock your boots off, follow these simple steps:
- Fill a large steel pot with water and place it on the stove or over a campfire.
- Once the water is hot, remove it from the heat source and let it cool for a minute (to prevent water from burning the coffee grounds).
- Add the desired amount of coffee to the pot (or follow a general rule of thumb i.e., one tablespoon of coffee per cup of water).
- Stir the coffee grounds into the water until they are completely immersed.
- Let the coffee steep for 3-5 minutes, depending on how strong you like it.
- After steeping, use a ladle to scoop the coffee grounds from the surface of the pot.
- Allow the coffee to settle for a minute or two before serving. This trick will help the grounds settle to sink to the bottom of the pot (like well-behaved children in a class).
- Pour the coffee slowly to avoid disturbing the settled grounds.
Voila! It is ready to serve.
Pros
- It is convenient to make and can be done anywhere, without any fancy equipment or tools.
Cons
- Difficulty in straining the coffee and without it, the coffee can have excessive sediment and grounds.
5. A Sieve Or A Fine Mesh Strainer
Who knew that a simple kitchen sieve could be your bff? Not only can it strain pasta and sift flour, but it can also filter coffee grounds like a boss.
How to do it
So, saddle up and follow the instructions below.
- Get yourself a fine-mesh strainer and you’re good to go. If not, brace yourself up for a gritty brew. (This is the only difference between a French press and a mesh strainer as the earlier has a very fine mesh filter)
- Put the coffee grounds in a container that’s heat-proof and can hold the amount of water you plan to use.
- For optimal outcomes, I recommend using a coarse grind. Add hot water and exercise your patience for at least 3-4 minutes.
- Stir it. Next up grab your cup and place the mesh strainer above. Steadily pour the coffee through the strainer.
Discard the ground coffee and enjoy.
Pros
- Customizable taste by adjusting the grind size and the amount of coffee used
Cons
- Using a mesh sieve can be messy, as it requires pouring the coffee through the sieve, which can lead to spills and splatters.
6. Use A Sock or Stocking As A Filter
Looking for an unconventional way to make your morning brew? Look no further than your sock drawer! (You heard it right)
How to do it
- Simply take a clean sock or stocking, cut off the toe part, and rinse it thoroughly to remove any lint or debris.
- Next, fill the sock with your desired amount of coffee grounds and tie a knot at the top to secure it. Place the sock in a container or mug, pour hot water over it, and let it steep for a few minutes.
- Once the coffee has been brewed to your liking, remove the sock, and voila! You have a delicious cup of coffee made with a sock.
So, why not give it a try and see how your morning cup of joe turns out? Who knows, it may just become your new favorite way to brew.
Pros
- Using a sock or stocking as a filter is an eco-friendly alternative to paper filters, as it reduces waste and eliminates the need for disposable filters.
Cons
- Socks and stockings are not designed to filter coffee, so they may not be as effective as paper filters or specialized coffee filters, and allows limited filtration.
7. Cheesecloth
Who says cheesecloth is just for making cheese? It can also filter your coffee and leave your taste buds saying “Oh, yes, please!
How to do it
- Grind your coffee beans to coarse grind size.
- Place the coffee grounds in the center of a double-layered square of cheesecloth.
- Bring the corners of the cheesecloth together, forming a pouch. Tie the corners with kitchen twine or a rubber band.
- Boil water for 30-40 seconds and allow it to cool slightly.
- Place the cheesecloth pouch in the bottom of a coffee mug, and slowly pour the hot water over it.
- Allow the coffee to steep for 3-5 minutes, or until it reaches your desired strength.
- Carefully remove the cheesecloth pouch from the mug, squeezing out any coffee excess.
Rejoice it!
Noted: If you plan to reuse the cloth in the future, rinse it well after use and allow it to air-dry.
Pros
- Cheesecloth is a reusable and biodegradable option, making it an eco-friendly alternative.
Cons
- Cheesecloth requires cleaning after each use, which can be more time-consuming than simply disposing of a paper filter.
8. Reusable Tea Bags
I know you might not have a tea bag lying around, (can be a bit pricey) but think of all the waste you’re saving. Plus, you can always pretend you’re on a fancy coffee date with your reusable tea bag. Who said coffee filters can’t be romantic?
How to do it
- Grab a reusable tea bag. It’s like a two-in-one deal, just without the questionable flavors.
- Add 2 tablespoons of finely ground coffee to the tea bag, seal it up, and place it in your favorite mug.
- Pour hot water over the bag and let it steep for a couple of minutes (I suggest 2)
Sans the pesky coffee grounds!
Pros
- Simple to use and time savior
Cons
- They’re not large enough to hold enough amount of coffee for those who like a strong brew.
9. Reusable filter
Who says you can’t save the planet one cup of coffee at a time? Well, you can do that with reusable filters.
How to do it
- Grind your coffee beans coarser as this will help prevent clogging in the filter.
- Add coffee into the reusable coffee filter (remember to clean the filter after each use to avoid the buildup of coffee oils and residue).
- Boil water to about 90-96°C, which is the optimal temperature.
- Pour the hot water over the coffee grounds, (cover all the grounds evenly).
- Let the coffee brew for 4-5 minutes, depending on your taste preference.
Pros
- They may cost more upfront and save you money in the long run compared to constantly buying disposable filters.
Cons
- Depending on the type of filter and the grind size of your coffee beans, reusable filters may be more prone to clogging than disposable filters.
10. Nut milk bag
Are you nuts about coffee? If so ditch the boring old filters and milk the most out of your coffee with a nut milk bag. (I know it already sounds tasty).
How to do it
- Grind your coffee beans to a medium or a bit coarse level.
- Scoop your coffee grounds into a nut milk bag.
- Boil water to your preferred temperature and pour it over the nut milk bag and into your mug (just clean it thoroughly before and after use, unless you want your coffee to taste like almonds!)
- Let the coffee steep for a few minutes, squeezing the nut milk bag occasionally to get the full flavor.
- Remove the nut milk bag and enjoy your smooth and delicious cup of coffee!
Noted: This method is also suitable for cold-brew coffee mugs.
Pros
- They are typically made from cotton or hemp, which are eco-friendly and biodegradable.
Cons
- Some users may find it difficult to get the coffee-to-water ratio just right, which can result in a weaker or stronger cup of coffee than desired.
11. Give A Try Instant Coffee
Who says instant coffee has to be boring? Say goodbye to filters and hello to instant coffee, the superhero of lazy mornings!
How to do it
All you need to do is to boil water to an optimal temperature, add your preferred quantity of instant coffee, and mix thoroughly. Ta-da! It’s all yours now.
Pros
- Super quick and convenient
- Long shelf life and cost-effective option
Cons
- Some brands may contain added sugars or artificial flavors
- It’s possible that instant coffee doesn’t have the exact full-bodied and intricacy.
12. Mud coffee
Mud coffee is thick and gritty, like a swamp in a cup. It’s way different than cowboy coffee which is full-bodied and has a bold flavor.
How to do it
Follow these steps:
- Boil water in a pot or kettle over a stove or campfire.
- Once you boil the water, take the water off the heat and let it cool.
- For each cup of water, add one tablespoon of finely ground coffee to the pot.
- Stir it and let it steep for a few minutes.
Pros:
Convenient and low-tech way, which can be a fun and nostalgic experience.
Cons
The straining process can be messy and time-consuming, (downside for those who value convenience.)
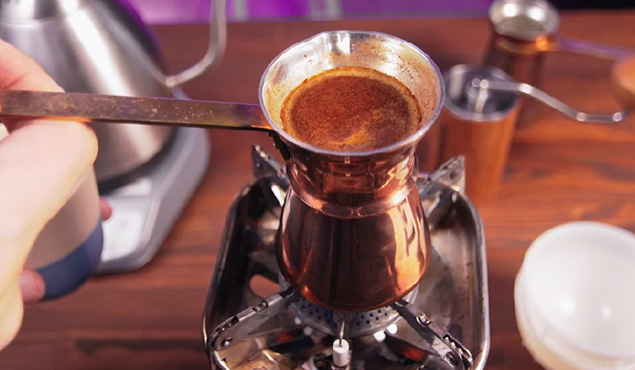
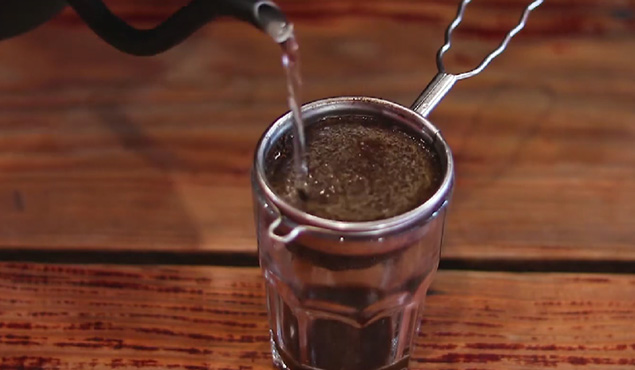
13. Turkish Coffee
Making Turkish coffee is like performing a mini coffee ceremony in your kitchen. Just add some magic and a dash of fortune-telling.
How to do it
- Grind fresh coffee beans to a fine powder.
- Add the coffee powder and water to a cezve (a small copper or brass pot).
- Add sugar to taste (optional).
- Place the cezve on low heat and stir until the sugar dissolves.
- Let the coffee simmer on low heat until a frothy layer forms on top (called the “kaimaki”).
- Pour the coffee into small cups, making sure to distribute the kaimaki evenly.
- Let the coffee ground sink in for a minute or two.
Pros
- It has an intense, rich, and complex flavor profile
Cons
- Requires special equipment i.e., a cezve and a fine coffee grinder, which can be expensive and not readily available.
Insights and Takeaways
In conclusion, learning how to make coffee without a filter can be an exciting experience that results in a unique and bold flavor profile. Though it may require a bit of experimentation and patience, the outcome is worth it.
As a fellow coffee enthusiast, I particularly enjoy two methods of making coffee without a filter: the French press and the classic cowboy method. The French press yields a smooth and rich cup of coffee, while the cowboy method adds a rustic and adventurous flair to my morning routine.
There are plenty of ways to enjoy a delicious cup of coffee without a filter, whether you prefer a more refined or rugged approach to your brewing. So why not embrace the grit and take your taste buds on a wild ride? Give these methods a try and see which one suits your palate the best.
FAQS
Can you prepare Vietnamese coffee without using a filter?
No, traditionally Vietnamese coffee is made using a filter called a “phin.” The phin allows the coffee to steep slowly and produces a rich, full-bodied flavor. While it may be possible to make Vietnamese coffee without a filter, it would not produce the same results.
How To Make Coffee Without A Coffee Maker?
Alternatively, you can opt for any of the above talked brewing techniques to make coffee without a coffee maker. Just be sure to adjust the measurements, temperature, and brewing times accordingly.
What is the easiest way to make coffee while camping?
Pour-over coffee and Instant coffee. No matter which method you choose, be sure to pack enough coffee and any necessary equipment, such as a kettle or stove, to ensure a delicious cup of coffee on your camping trip.
How To Make Ground Coffee Without Filter?
To make your filter-less coffee, simply boil water, add coffee grounds to the water, and let it for 2-3 minutes. Use a spoon to scoop out any grounds that have settled at the bottom before pouring the coffee into a mug. Or you can use a napkin, cheesecloth, or paper towel for straining.
Are coffee filters necessary?
Coffee filters are not strictly necessary, but they can help to remove sediment and oils from the coffee, resulting in a smoother and cleaner taste. Additionally, filters can help to prevent clogs in coffee makers and reduce the need for cleaning.