How To Use Breville Espresso (13 Step Guide With Tips & Tricks)

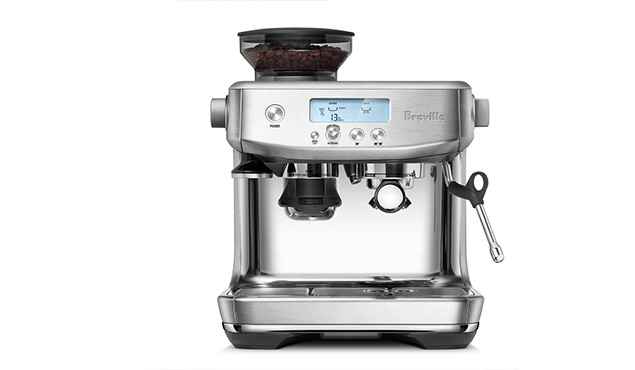
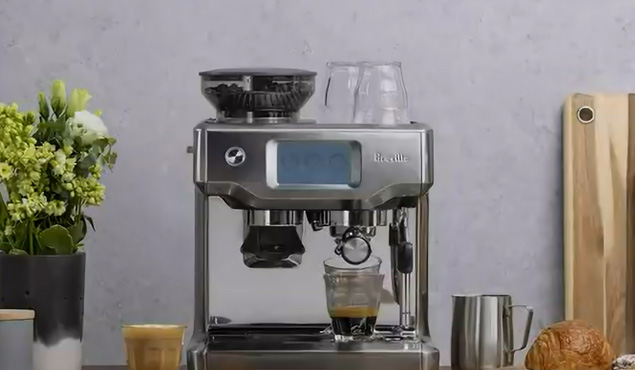
From rookies to pros, the Breville lineup has something for everyone. Among them, the Barista Express reigns as the espresso machine supreme for home brewing.
Join me as I spill the beans on expert tips and tricks for using Breville espresso machines, with a focus on the marvelous Barista Express. How to use your Breville espresso machine will no longer be a mystery!
These secrets transcend models, so whether you’re a proud Barista Express owner or rock any Breville machine.
Step 1# Familiarise Yourself with Your Breville Espresso Machine
To start off, get familiar with your machine and refer to the manual for guidance. Remember these key points:
- Add water to the reservoir without overfilling it.
- Empty the drip tray after each brew to avoid overflow.
- Insert coffee grounds in the portafilter and tamp them evenly.
- Learn how to use the steam wand for frothing milk correctly.
With these basics in mind, get ready to enjoy a wonderful coffee journey with your Breville espresso machine.
Step 2# Read The User’s Manual
Once you unbox your shiny new Breville espresso machine, take a moment to glance through the manual. We know the excitement of brewing your first cup might be calling, but having some information on hand will save you from any potential confusion down the road.
Don’t worry if the manual seems a bit overwhelming with all the technical jargon. It’s there to make your brewing experience smoother and safer. Trust me, after you whip up your first delicious drink, everything will start to make sense and feel like a breeze.
Step 3# Preparing the Machine for Use
Before diving into your first brew, it’s essential to prepare the machine. Wash the removable parts like the water tank, portafilter, filter basket, water filter holder, and milk jug (remember, not dishwasher-safe).
Give the machine a quick wipe with a damp paper towel or soft cloth, keeping it spick and span.
Key step: After powering on, the espresso machine quickly prepares for use. The bumping noise is normal. When all 6 buttons are lit, it’s ready in under 30 seconds. Allow 15 minutes for preheating to ensure ideal water temperature.
While it preheats, place your mug on the warming tray for longer-lasting warmth. Don’t forget to load up the grinder with plenty of coffee beans if your machine has one.
Always remember to check the water level in the Breville Barista Express. Unlike a Keurig, this machine doesn’t have a low water level warning. To avoid any issues, it’s important to double-check the water level each time you use it.
Oh, and don’t forget the water filter! Soak it in water for 5 minutes, rinse it, and then lock it into the filter holder. Slide the washed water tank to the back of the machine, and fill it up with cold water.
Step 4# Put Together the Coffee Beans
Once the machine is all warmed up, it’s time to add those delightful coffee beans to the “hopper”. No need to stress about exact measurements here, just make sure you have enough to satisfy your coffee cravings.
What type of Coffee beans should be used in an espresso machine for best results?
For the best espresso flavor, choose high-quality whole beans that have been freshly roasted. Look for beans roasted within a week for optimal freshness.
The peak flavor is typically experienced between 2-10 days after roasting. If you can’t find beans that recent, don’t worry, as coffee beans can maintain their flavor for about 30 days after roasting.
To preserve the freshness, always grind the beans just before brewing.
Remember: Pre-ground coffee quickly loses its flavor. Store your beans in a cool and dark place, preferably in an airtight container such as a Ziplock bag.
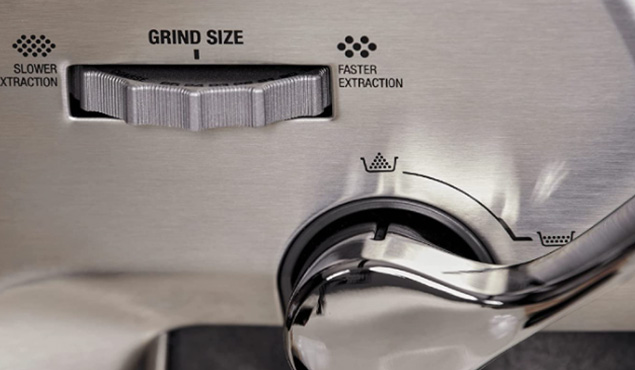
Step 5# Adjusting the grind size and quantity for optimal results
Now comes the exciting part, but it can also be a bit overwhelming. Don’t worry, it’s a trial-and-error process, especially when using different coffee beans.
To start, set the grind size to 5—the recommended number by Breville. You might not need to adjust this often. However, initially, you may need to make a few tweaks. For now, let’s keep the grind amount in the middle, at the 3 o’clock position.
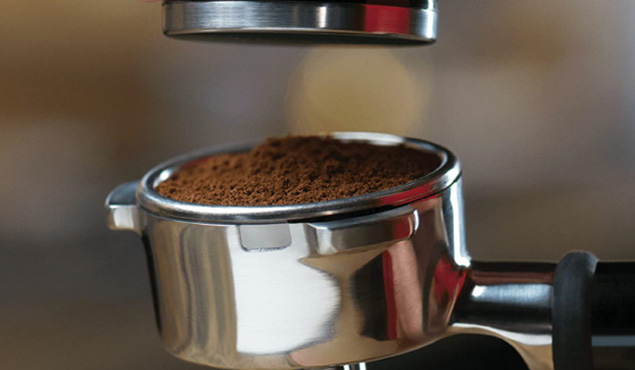
Step 6# Weigh the Portafilter!
Inspect the portafilter, marked on the green scale, where the freshly ground coffee will be placed. Ensure it is completely dry before adding any coffee.
For a single shot of espresso, target 8-10 grams of ground coffee, and for a double shot, aim for 15-18 grams.
To achieve accuracy, weigh the portafilter initially and reset the weight to zero. This will guarantee the precise amount of ground coffee with each use.
Step 7# Grind the Opted Coffee Beans
- Place the portafilter in the “Grind Outlet” after zeroing it out.
- Choose the desired espresso size (Single or Double) by pressing the corresponding filter size button.
- Initiate the grinding process by giving the portafilter a quick push and release.
- Weigh the obtained ground coffee.
- For a double shot (15-18 grams), no adjustments are necessary if within the optimal range.
- If you have more than 18 grams, remove some coffee and adjust the Grind Amount for future brewing.
- If you have less than 15 grams, hold the portafilter while grinding to add more coffee, then release and weigh again.
- Repeat until the desired weight is achieved, adjusting the Grind Amount accordingly for subsequent brews.
Step 8#Compress the Coffee Grounds
Before tamping, use your hands to push the loose coffee toward the center of the portafilter, preventing any spillage.
What should be the optimal Tamping Pressure?
When it comes to tamping, finding the right pressure is a trial-and-error process. You want to apply more pressure than just a simple press but avoid going overboard. Insufficient pressure leads to low extraction pressure, while excessive pressure results in high extraction pressure.
My recommendation: press down to make the grounds even and flat, then give it a few extra gentle pushes for tamping. Avoid excessive force.
Tamping Tip: Twisting the tamper at the end before removing it helps maintain level grounds.
Remove excess coffee grounds from the portafilter
Before brewing your espresso, ensure you wipe off any excess coffee grounds from the portafilter. Loose grinds can hinder the proper sealing of the portafilter.
Step 9# Run a cup of hot water before brewing your coffee
To kickstart the brewing process, simply press the POWER button and brace yourself for the delightful sounds of the machine heating up the water.
Before and after each espresso session, it’s a smart move to let hot water run through the machine. Press the 2 CUP button and allow the hot water to flow out of the group head—the spot where the portafilter goes in and the magic happens.
For the initial machine use, give the steam a 10-second burst, and repeat the flushing process until the water tank is emptied. Once that’s done, refill the water tank, and voila!
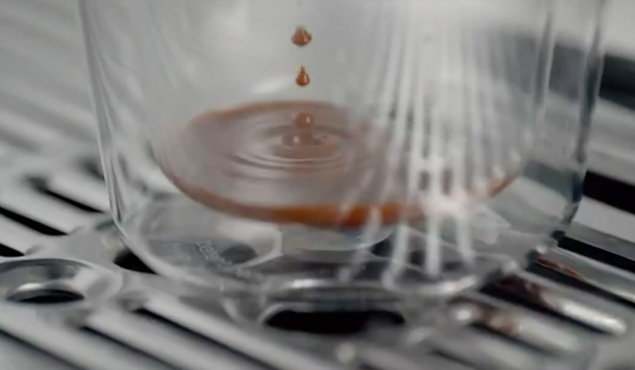
Step 10# Retrieve the espresso by extracting
To start brewing your espresso, insert the portafilter into the “Group Head” and lock it in place. For a double shot, press the 2-cup button and monitor the red pressure needle.
If the needle falls within the grey “Espresso Range,” you’ve brewed the cup of espresso!
If the needle falls below the range, consider increasing your tamping pressure next time. If the needle goes above the range, try decreasing your tamping pressure in future attempts.
Step 11# Pour milk into the jug
To achieve a perfect froth, fill the milk jug until the milk touches the bottom of the V-shaped spout.
For a richer and finer froth, ensure both the milk and jug are as cold as possible. Storing the jug in the freezer or refrigerator helps maintain the desired temperature.
Opt for higher-fat milk, such as whole milk, for better results compared to skim milk.
Step 12# Purge the Steam Wand
Perform a “purge” by placing the wand over the drip tray and turning the dial to “Steam” before using it. After 10-15 seconds of water and steam, switch back to Standby mode. Swiftly insert the wand into the milk within 8 seconds, then switch back to steam to avoid dripping water into the milk.
Step 13# Steam & Froth the Milk (as per your savor)
Prior to using the wand, remember to purge it by placing it over the drip tray and setting the dial to “Steam”.
After approximately 10-15 seconds, water will begin to drip, followed by the release of steam. Allow the steam to flow for a few seconds before switching the machine back to Standby mode.
Swiftly insert the wand into the milk within 8 seconds, then switch back to steam.
Tip Position
Position the wand tip just under the milk’s surface, approximately 1/4 inch. Avoid placing the tip too low to prevent a high-pitched screeching sound.
Similarly, don’t position the tip too high, as it may create large bubbles and result in milk splashing. Tilt the jug slightly to create a swirling motion, resembling a whirlpool effect.
Temperature Tidbits
Hold the handle with your right hand and support the bottom of the jug with your left. When the jug’s bottom gets too hot to touch, the milk is ready. Switch the dial to standby. Tap the jug gently and swirl the milk to remove larger bubbles.
After steaming the milk, purge the steam wand by placing it over the drip tray and switching the dial back to steam. This removes milk residue and prevents unwanted flavors. Remember to do this every time you steam milk and ensure all users are aware of its importance.
Cleaning and Maintenance of the Espresso Machine
To maintain your Breville espresso machine, clean it every 10-20 uses using either cleaning tablets or a water and vinegar solution. Regularly wipe down external components like the portafilter and steam wand to prevent coffee residue buildup.
Use a wet washcloth to immediately wipe off milk from the steam wand to prevent drying.
Takeaway
This guide provides a basic foundation for using your Breville espresso maker. It’s just the beginning, as these machines have many features and options to explore. Mastering the simple techniques outlined here will give you a solid start. Once you’re comfortable, you can dive into the owner’s manual and experiment with advanced features.
Remember, learning the basics is essential before exploring more advanced techniques. We hope you found this guide helpful as you embark on your journey with your Breville espresso machine. Get ready for a wonderful world of home espresso enjoyment!
FAQs
How do you make coffee with a Breville espresso machine?
To brew coffee in your Breville espresso machine, grind your whole coffee beans to a fine consistency. Heat water to the appropriate temperature, then pour it into the reservoir. Finally, insert the portafilter and you’re ready to brew!
What is the best setting for espresso in Breville?
Personalize the intensity of your coffee by adjusting the grind level. Start with a grind level of 14 and use the machine’s grind dial to fine-tune your flavor. Move it towards coarse for a milder taste or towards fine for a bolder, more robust flavor. Experiment to find your perfect balance!
What does the flashing light on Breville coffee machine mean?
The milk temperature and milk foam indicator lights will keep flickering until you clean the steam tip as instructed in the ‘Cleaning the Steam Wand’ section.