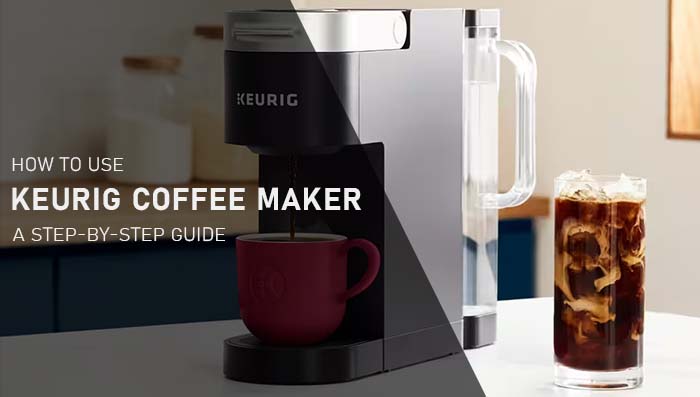
How To Use A Keurig Coffee Maker? (A Step-By-Step Guide)
Single-cup coffee makers, like Keurig, provide quick and convenient coffee brewing. These coffee makers offer a variety of coffee flavors to choose from and eliminate the waste of an entire pot of coffee going unused.
They are also easy to clean, with removable parts that can be washed and reused. The compact size of these coffee makers also makes them an excellent option for small kitchens or offices where counter space is limited.
Whether you’re a coffee lover or need a quick pick-me-up, single-cup coffee makers offer a convenient solution for satisfying your caffeine cravings. These coffee makers have become popular in homes, workplaces, and businesses, making it essential to understand how to use them.
Our guide will help you learn how to use a Keurig coffee maker, including step-by-step instructions and suggestions for buying the best models. Enjoy a delicious cup of coffee in just minutes with a single-cup coffee maker.
How to use Keurig coffee maker: Initial setup and cleansing brew
Setting up a Keurig is no challenging task. The Keurig machine is designed to be easily accessible and understandable. These machines are updated and upgraded to make your experience serene and brief. Its setup instructions take up a maximum of 10 minutes in just a few steps.
Here are the initial setup steps for a Keurig coffee machine before brewing:
1. Unpack and remove any packaging:
Carefully remove the coffee machine from the box and any packaging materials. Check for any stickers or labels and remove them.
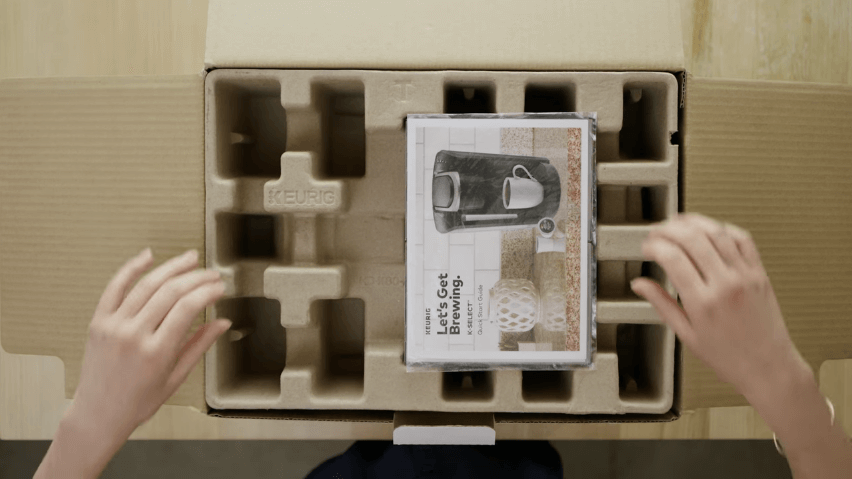
Be sure to recycle or dispose of the packaging materials responsibly.
2. Fill the water reservoir:
Locate it on the coffee machine and fill it with fresh, cold water. Avoid using hot water or water with any impurities, as this can affect the taste of your coffee.
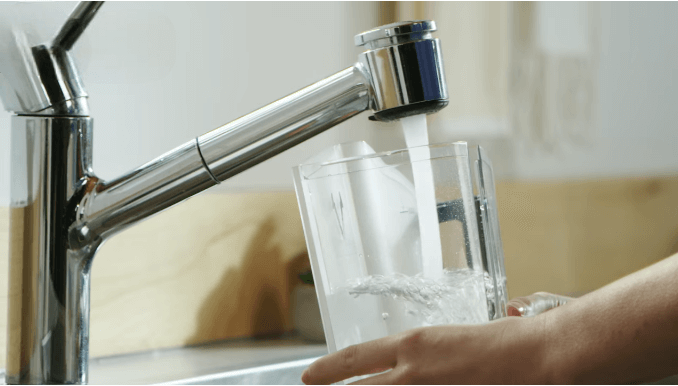
Make sure the water level is sufficient for the size of cup you want to brew.
3. Plug in the machine:
Find a suitable electrical outlet near your coffee machine and plug it in.
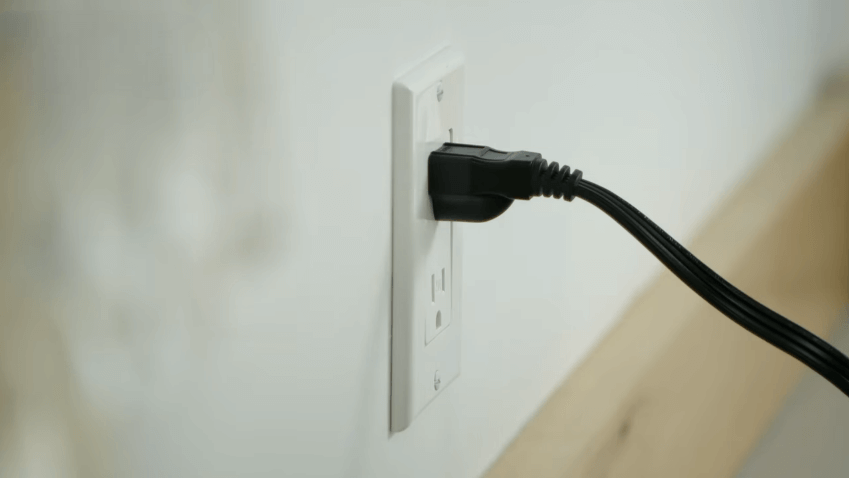
Turn the device on by pressing the power button.
4. Place a mug:
Position a mug on the drip tray under the dispenser.
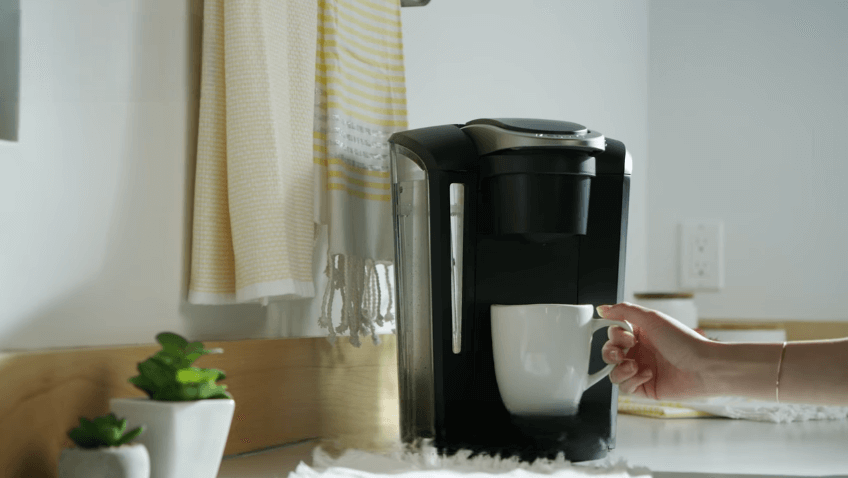
Ensure that the mug is of a suitable size and shape for your desired cup of coffee. The drip tray should be adjusted to accommodate the height of your mug.
5. Preheat the machine:
The coffee machine will automatically begin to preheat. Wait until the LED light turns off to indicate that the machine is thoroughly heated. This usually takes a few minutes.
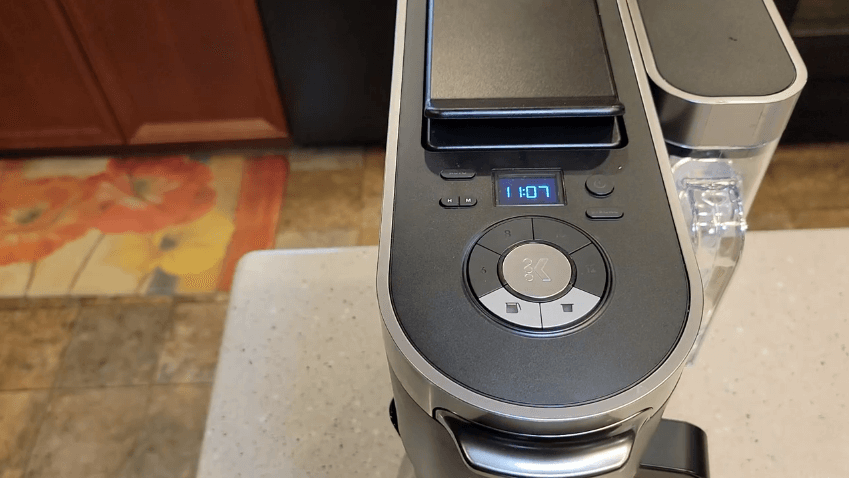
6. Choose your settings:
Some Keurig models have options for cup size and brew strength. Refer to the user manual for specific instructions on accessing and adjusting these settings.
If your model does not have these options, it will default to a standard cup size and brew strength.
7. Clean the machine:
Before first use, some Keurig models may require a cleaning cycle. Refer to the user manual for specific instructions on how to run this cycle. This is important for ensuring that the machine is free of any impurities and ready to make a great cup of coffee.
How to brew coffee in Keurig?
Here is a precise step-by-step guide on how to brew coffee using a Keurig coffee maker:
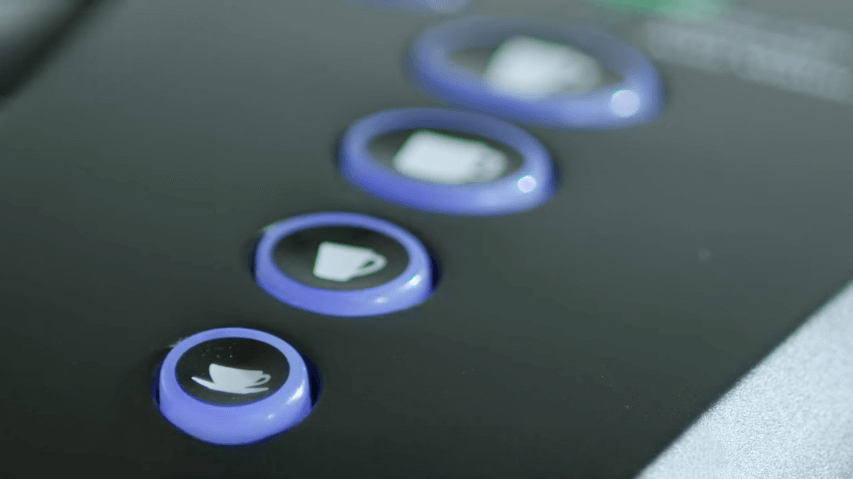
1. Choose your cup size:
Depending on your Keurig model, you may have the option to select the cup size that you want to brew. Most Keurig models offer multiple cup sizes, such as 6 oz., 8 oz., and 10 oz.
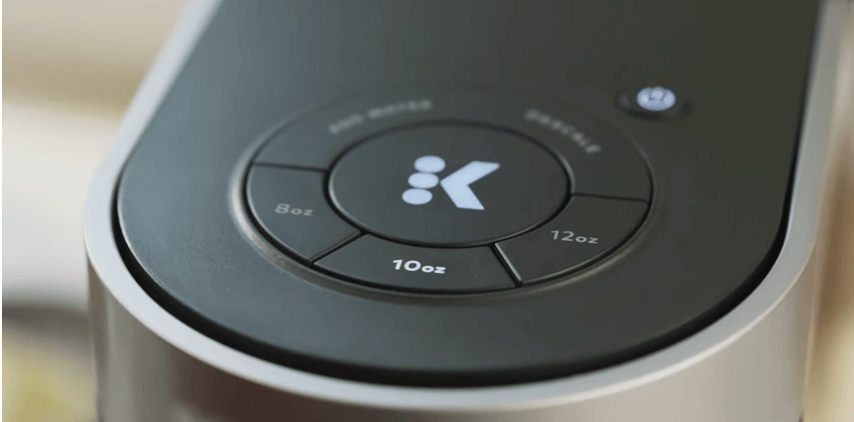
This option is usually located on the control panel or display screen. Make sure to choose the right cup size for your mug to avoid overfilling or spillage.
2. Insert a K-Cup:
Locate the K-Cup holder on your coffee machine and open it by lifting the handle.
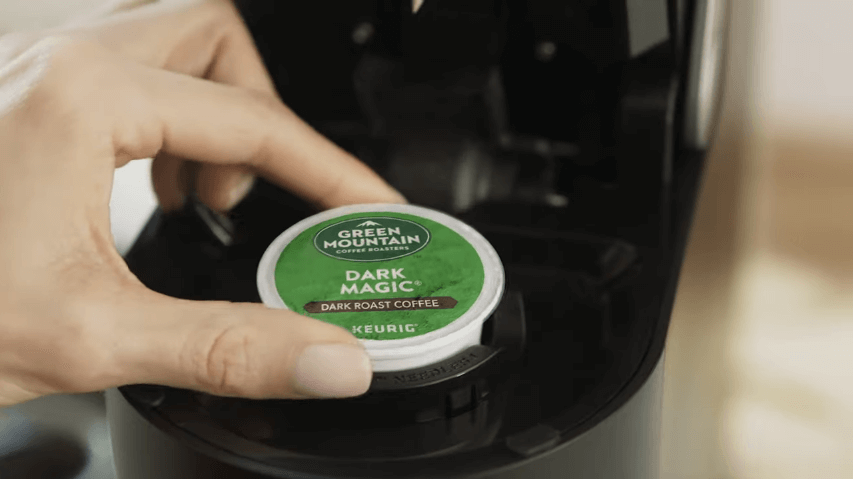
Please choose your desired K-Cup and place it inside the holder, ensuring that the puncture needle is positioned over the center of the K-Cup. Close the holder by lowering the handle.
3. Start brewing:
Once the K-Cup is securely in place, press the brew button to start the brewing process.
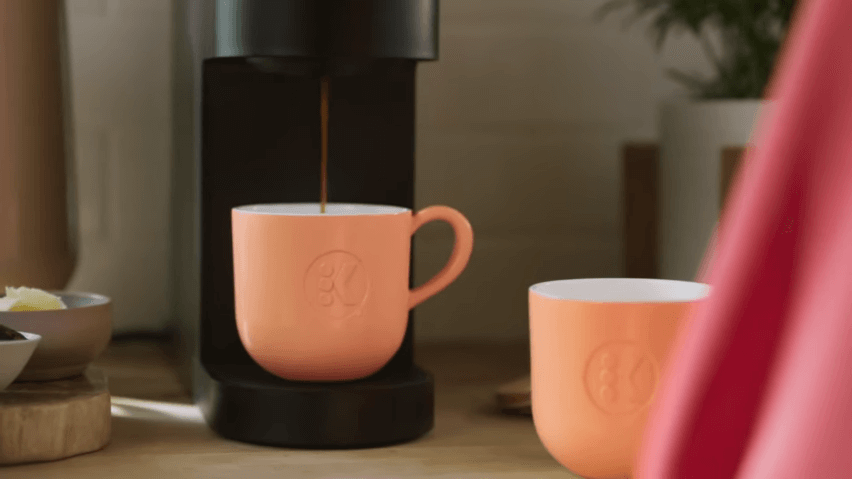
You will hear the machine start to dispense the coffee into your mug. The brewing process usually takes less than a minute.
4. Dispose of the K-Cup:
After the brewing process, the used K-Cup will automatically be ejected into a disposal area. Carefully remove the used K-Cup and dispose of it in a trash or compost bin.
5. Enjoy your coffee:
Finally, take a sip of your freshly brewed coffee and enjoy the rich, satisfying taste. You can add cream, sugar, or other flavors to your coffee.
By following these steps, you can easily make a delicious cup of coffee with your Keurig coffee machine. Enjoy!
Note: Some models may have slightly different set-up processes, so consult your specific model’s user manual for additional instructions.
What is the difference between Keurig Auto-Brew and Auto-On?
“Auto-Brew” is a convenient feature that allows you to set a specific time for your Keurig coffee maker to start brewing a cup of coffee. This feature eliminates turning on the machine and starting the brewing process manually. Set when you want your coffee ready, and the machine will automatically begin brewing. This feature is perfect for early risers who want to enjoy a hot cup of coffee as soon as they wake up or for busy people who don’t have time to wait for the machine to warm up and start brewing.
“Auto-On” is a similar feature that automatically turns on your Keurig coffee maker at a pre-set time. This feature is ideal if you want your coffee maker to be ready to use as soon as you wake up or when you arrive home from work. Set when you want the machine to turn on, and it will be ready for use when you need it. This feature is also energy-efficient, as it turns off the machine when it is not in use, saving energy and reducing energy bills.
In summary, “Auto-Brew” and “Auto-On” are two convenient features that make it easier and more convenient to use your Keurig coffee maker. These features allow you to set a specific time for the machine to start brewing or turn on, so you can enjoy a hot cup of coffee without operating the device manually. These features can also save you time and energy, making your daily coffee routine more enjoyable.
How to make Keurig coffee taste better?
Here are some additional tips to make your Keurig coffee taste better:
1. Use good quality coffee beans:
The quality of the coffee beans you use can significantly impact the taste of your coffee.
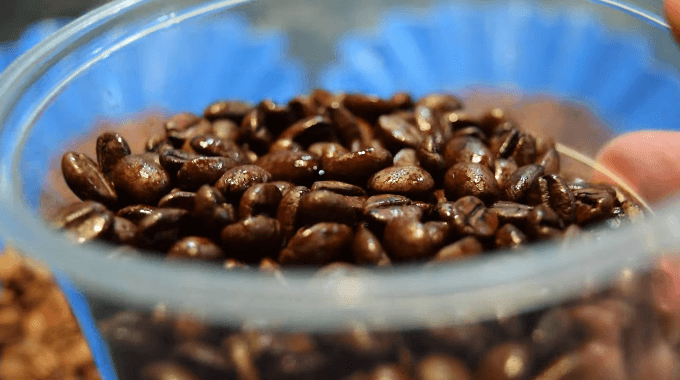
Choose high-quality, freshly roasted coffee beans to ensure a great-tasting cup of coffee.
2. Adjust the water temperature:
If the water temperature is too low, the coffee will taste weak and watery. If the water temperature is too high, the coffee can taste bitter. Keurig machines typically brew at around 200°F, the optimal temperature for brewing coffee.
3. Adjust the brew time:
The brew time can also impact the taste of your coffee. If the brewing time is too short, the coffee can taste weak and under-extracted. If the brewing time is too long, the coffee can taste bitter and over-extracted.
4. Use the correct cup size:
Selecting the correct one is essential for ensuring that your coffee has the right balance of flavor and strength. Experiment with different cup sizes to find the one that works best for you.
5. Use the right grind size:
The grind size can also impact the taste of your coffee. If the grind size is too coarse, the coffee can taste weak and under-extracted. If the grind size is too fine, the coffee can taste bitter and over-extracted. Use a medium grind size for the best results.
6. Customize your brewing settings:
Some Keurig models allow you to adjust the brew strength, water temperature, and brew time. Experiment with these settings to find the combination that works best for you.
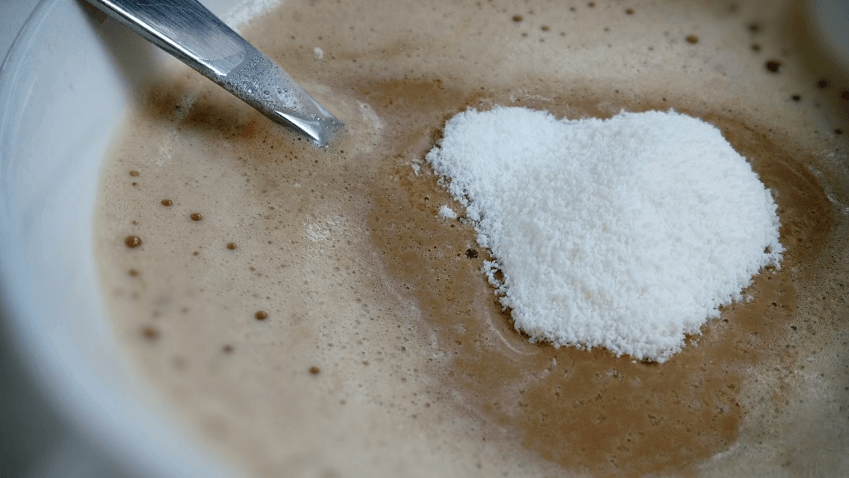
7. Use cream and sugar sparingly:
Adding cream and sugar to your coffee can help to mask any imperfections in the flavor. However, it’s best to use these ingredients sparingly to allow the authentic taste of the coffee to shine through.
By following these tips, you can significantly improve the taste of your Keurig coffee and enjoy a delicious cup of coffee every time.
Keurig isn’t brewing: What should I do?
If your Keurig coffee maker is not brewing correctly, there are several steps you can take to troubleshoot the issue:
Check the water level:
Ensure the water tank is filled with enough water to brew a cup of coffee. Empty the water tank, and fill it with fresh, cold water.
Check the K-Cup:
Ensure that the K-Cup is securely in place and the puncture needle is not clogged. If the needle is blocked, remove the K-Cup and clean the needle with a damp cloth.
Check the power source:
Make sure that the Keurig is plugged in and that the power source is working. Check the electrical outlet for any signs of damage or wear, and ensure that it provides power to the machine.
Clean the Keurig:
Regular descaling is essential to keep your Keurig coffee maker in good working order. Descaling removes mineral buildup that can clog the machine and impact its performance. Follow the instructions in your Keurig user manual to descale the machine.
Restart the machine:
Sometimes, simply restarting the machine can resolve the issue. To do this, unplug the Keurig and wait 30 seconds before plugging it back in.
Check the brew head:
The brew head is responsible for directing the water into the cup. If it is clogged, it may prevent water from flowing into the cup. Clean the brew head by removing debris and wiping it down with a damp cloth.
Replace the pump:
If the pump is damaged, it may need to be replaced. If you are unsure how to replace the pump, contact Keurig customer service for assistance.
By following these steps, you should be able to resolve most issues that may prevent your Keurig from brewing. If you are still having problems, you may want to consult the user manual or contact Keurig customer service for additional support.
Expert tips for maintaining your Keurig coffee maker
These expert tips for maintaining your Keurig coffee maker are designed to help keep your machine in top working condition and ensure that you continue to enjoy great-tasting coffee for years to come. Here are more details:
Clean regularly:
Cleaning your Keurig periodically is essential for keeping the machine running smoothly and preventing the buildup of mineral deposits.
Use a damp cloth to wipe down the exterior of the machine and a descaling solution to remove mineral buildup from the interior every 3-6 months or more frequently if you live in an area with hard water.
Related Read: Can I Use Tap Water In My Keurig?
Use high-quality K-Cups:
Using high-quality K-Cups is vital to avoid clogs and maintain the quality of your coffee.Avoid using generic or refillable K-Cups containing grinds that can clog the machine.
Store properly:
Proper storage can help to extend the life of your Keurig coffee maker. Store it in a dry, cool place away from moisture and humidity, which can cause damage to the machine.
Don’t overuse:
Overuse can cause your Keurig coffee maker to overheat and can result in performance issues. Limit your use to once an hour or less to avoid this.
Run water-only cycles:
Running water-only processes after brewing can help to flush out any coffee residue and keep the machine clean.
Use filtered water:
Using filtered water can improve the taste of your coffee and prevent mineral buildup in the machine.
Replace parts as needed:
Over time, certain features of your Keurig may need to be replaced, such as the pump, the brew head, or the water filter. Replacing these parts promptly can help to maintain the performance of your machine and ensure that you continue to enjoy great-tasting coffee.
By following these tips, you can help to keep your Keurig coffee maker in good working order and ensure that it continues to produce great-tasting coffee for years to come.
FAQs
What is the difference between Keurig 1.0 and 2.0?
The Keurig 1.0 and 2.0 models have several other differences apart from compatibility. The Keurig 2.0 models have a more advanced brewing technology, which helps deliver a better and more consistent brewing experience. They also feature a color touch screen, which makes it easier to navigate the different brewing options and customize your coffee as per your preference.
Another difference between the two models is the size of the water reservoir. Keurig 2.0 models usually have a more extensive water reservoir compared to the Keurig 1.0 models, which means you can brew more cups of coffee before having to refill the tank. Additionally, Keurig 2.0 models also come with a hot water dispenser, which can be used to make tea or hot chocolate.
Can I use ground coffee in Keurig?
Refillable K-Cups, also known as reusable K-Cups, are unique pods designed to be filled with ground coffee. They can be used in Keurig machines as an alternative to the pre-packaged K-Cup pods. However, it’s important to note that even with a refillable K-Cup, the brewing process is still different from using ground coffee in a traditional coffee maker.
The pre-packaged K-Cup pods or the refillable K-Cups are designed to work with Keurig’s patented brewing system. The system punctures the K-Cup pod or the refillable K-Cup, and then hot water is forced through the coffee to brew a single serving of coffee. On the other hand, traditional coffee makers work by immersing the ground coffee in hot water, which allows the coffee to be steep and extracts its flavor.
What is the function of the Keurig strong button?
The strong button on a Keurig coffee maker allows the user to brew a more substantial and bolder cup of coffee. This feature increases the flow rate and amount of water used in the brewing process, resulting in a more robust and intense flavor. This function is helpful for those who prefer a more full-bodied cup of coffee or those who use a lighter roasted coffee bean. The strong button is typically found on Keurig 2.0 models, but not all Keurig models have this feature.
How do I get replacement parts for my Keurig?
The different parts of a Keurig are easily accessible and are not hard to find. They are available in standard retail stores located near your house. These parts are sold separately at Walmart, Target, and other home appliance shops. If you tend to buy these online, they can be found on websites such as amazon within a reasonable price range.
What are the different size buttons for a Keurig?
The different size buttons on a Keurig determine the amount of water used in the brewing process, affecting the size of the cup of coffee produced. Common size options are small (6 ounces), medium (8 ounces), large (10 ounces), and extra large (12-14 ounces). The same size options depend on the model of the Keurig.
How Do I Get Replacement Parts For My Keurig?
Replacement parts for a Keurig coffee maker can be obtained through Keurig’s official website or customer service line. You can also find replacement parts at authorized retailers that sell Keurig products. If you are unsure about what part you need, you can contact Keurig customer service for assistance. Additionally, some third-party retailers also offer replacement parts for Keurig machines.